Originally posted at Serverless
*Update: This post is based on the beta version of Serverless Components, which is not compatible with the latest, and much faster, GA version. Please check out the latest docs for more up to date information.*
Introduction
You might have already heard about our new project, Serverless Components. Our goal was to encapsulate common functionality into so-called “components”, which could then be easily re-used, extended and shared with other developers and other serverless applications.
In this post, I’m going to show you how to compose a fully-fledged, REST API-powered application, all by using several pre-built components from the component registry.
Excited? Let’s go!
Wait, what are components again?
I’m going to start with a quick refresher on Serverless Components. If you already know all about them, then jump straight to install or building the app.
In essence, components are logical units which encapsulate code to perform certain actions. Components expose an interface so that they can be re-used easily by others without them having to know the inner workings. They can be orchestrated and nested to build higher-order functionalities, like so:
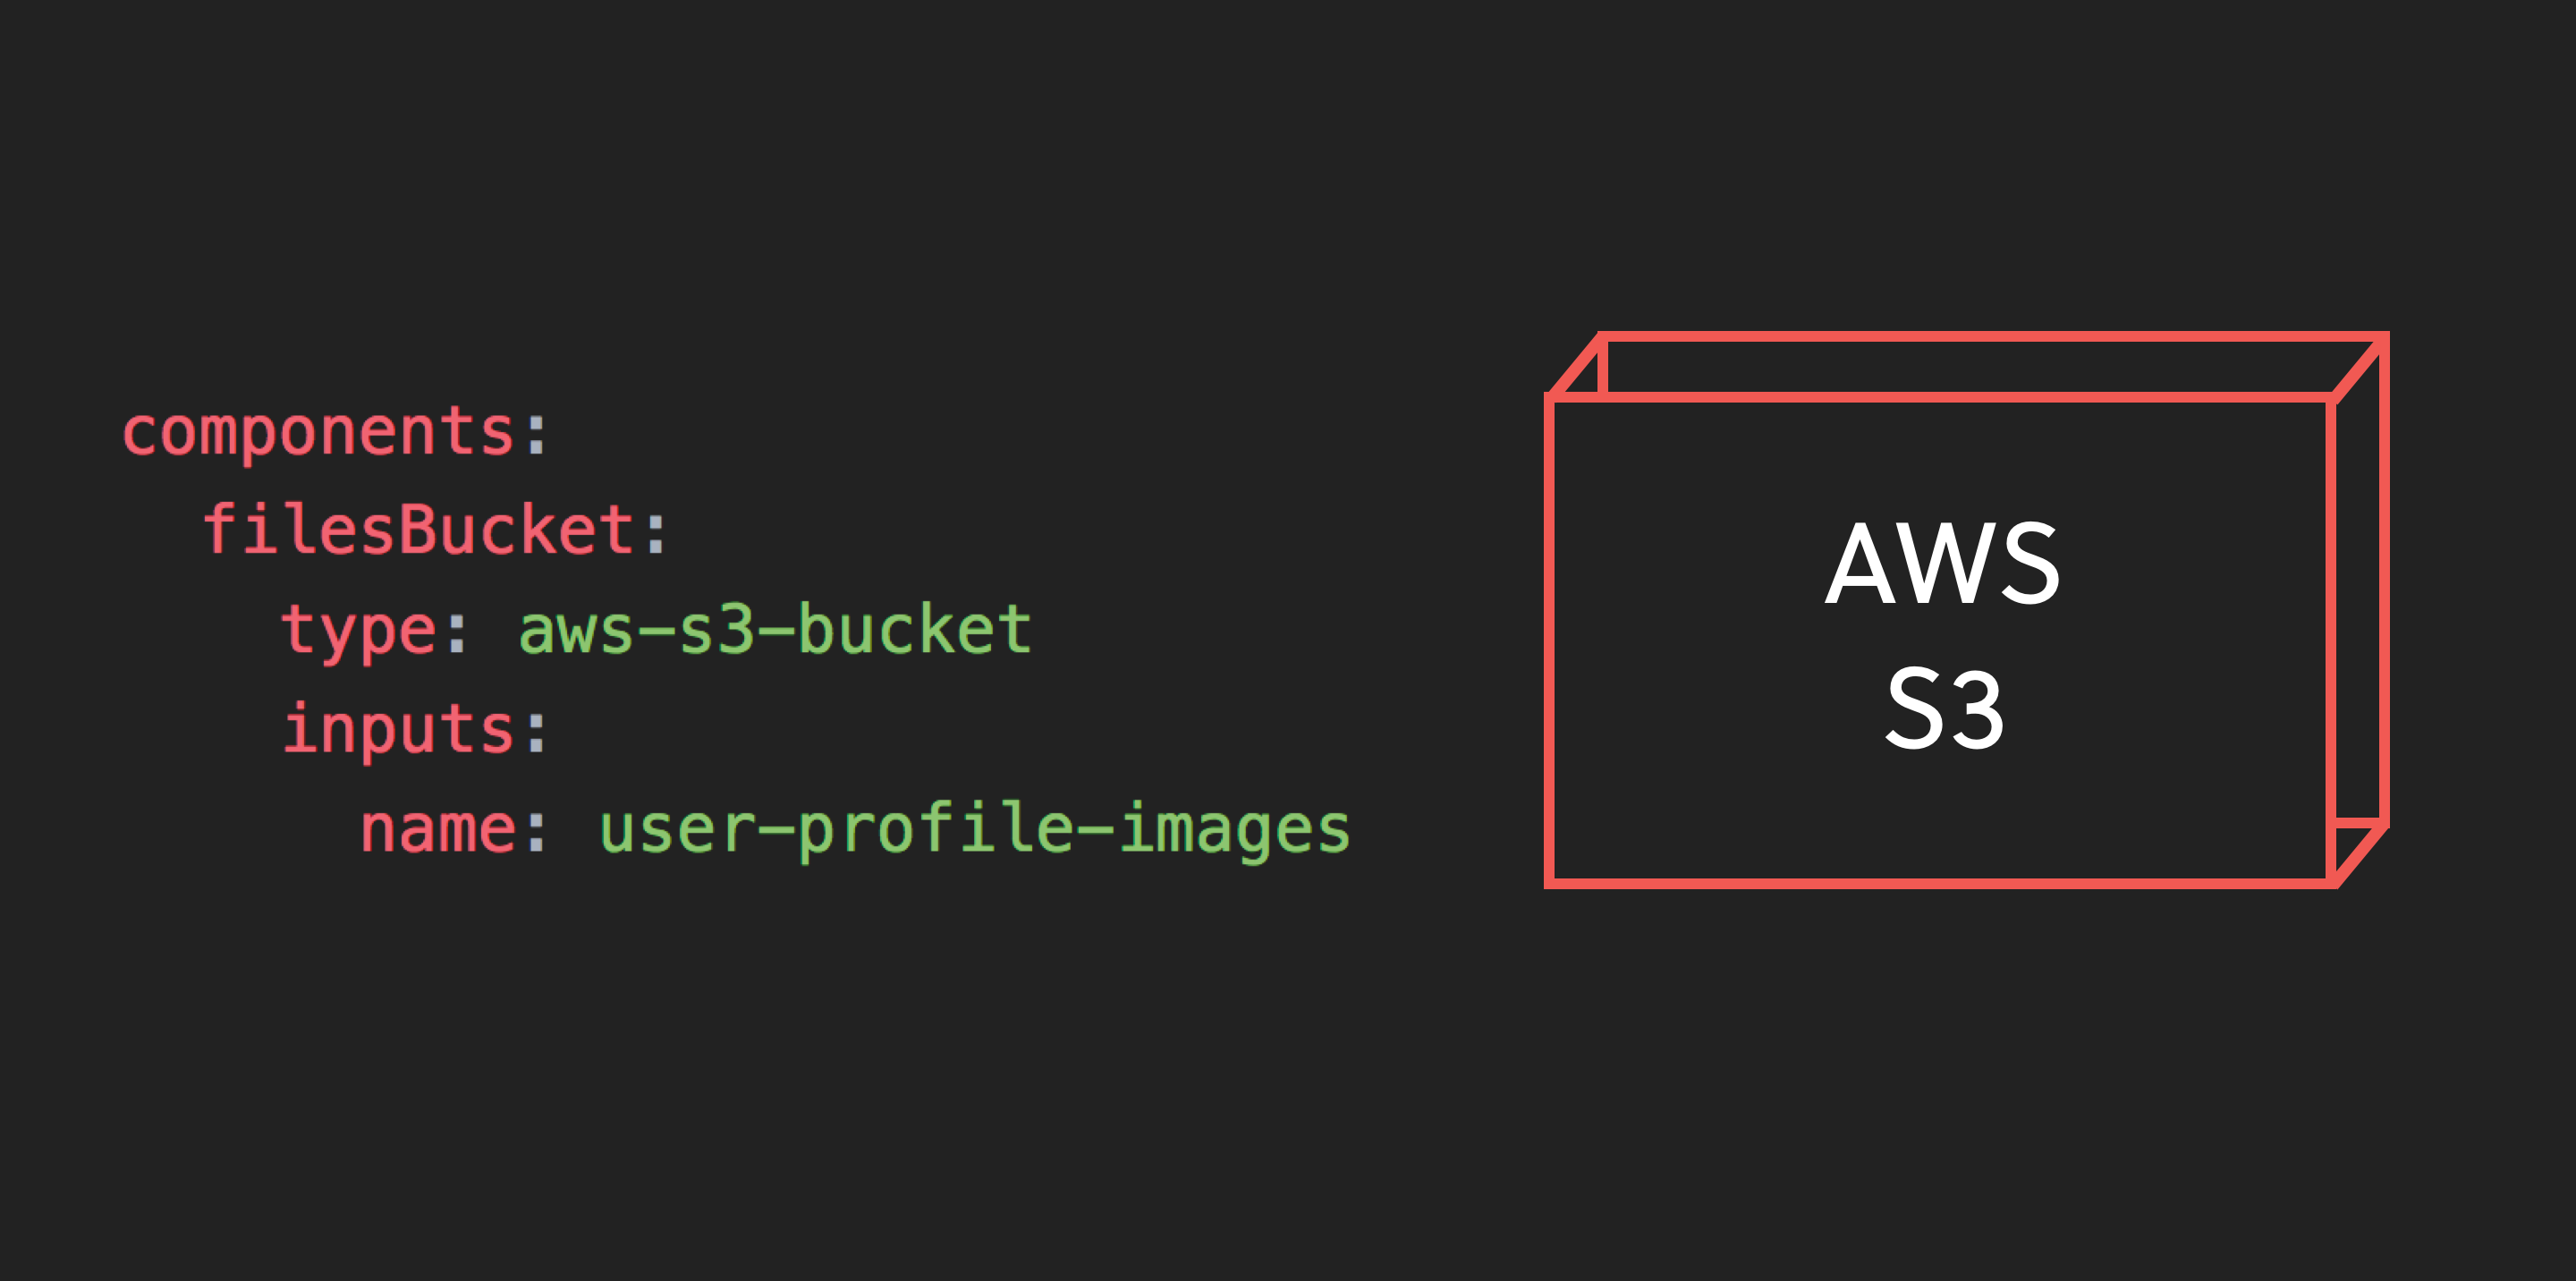
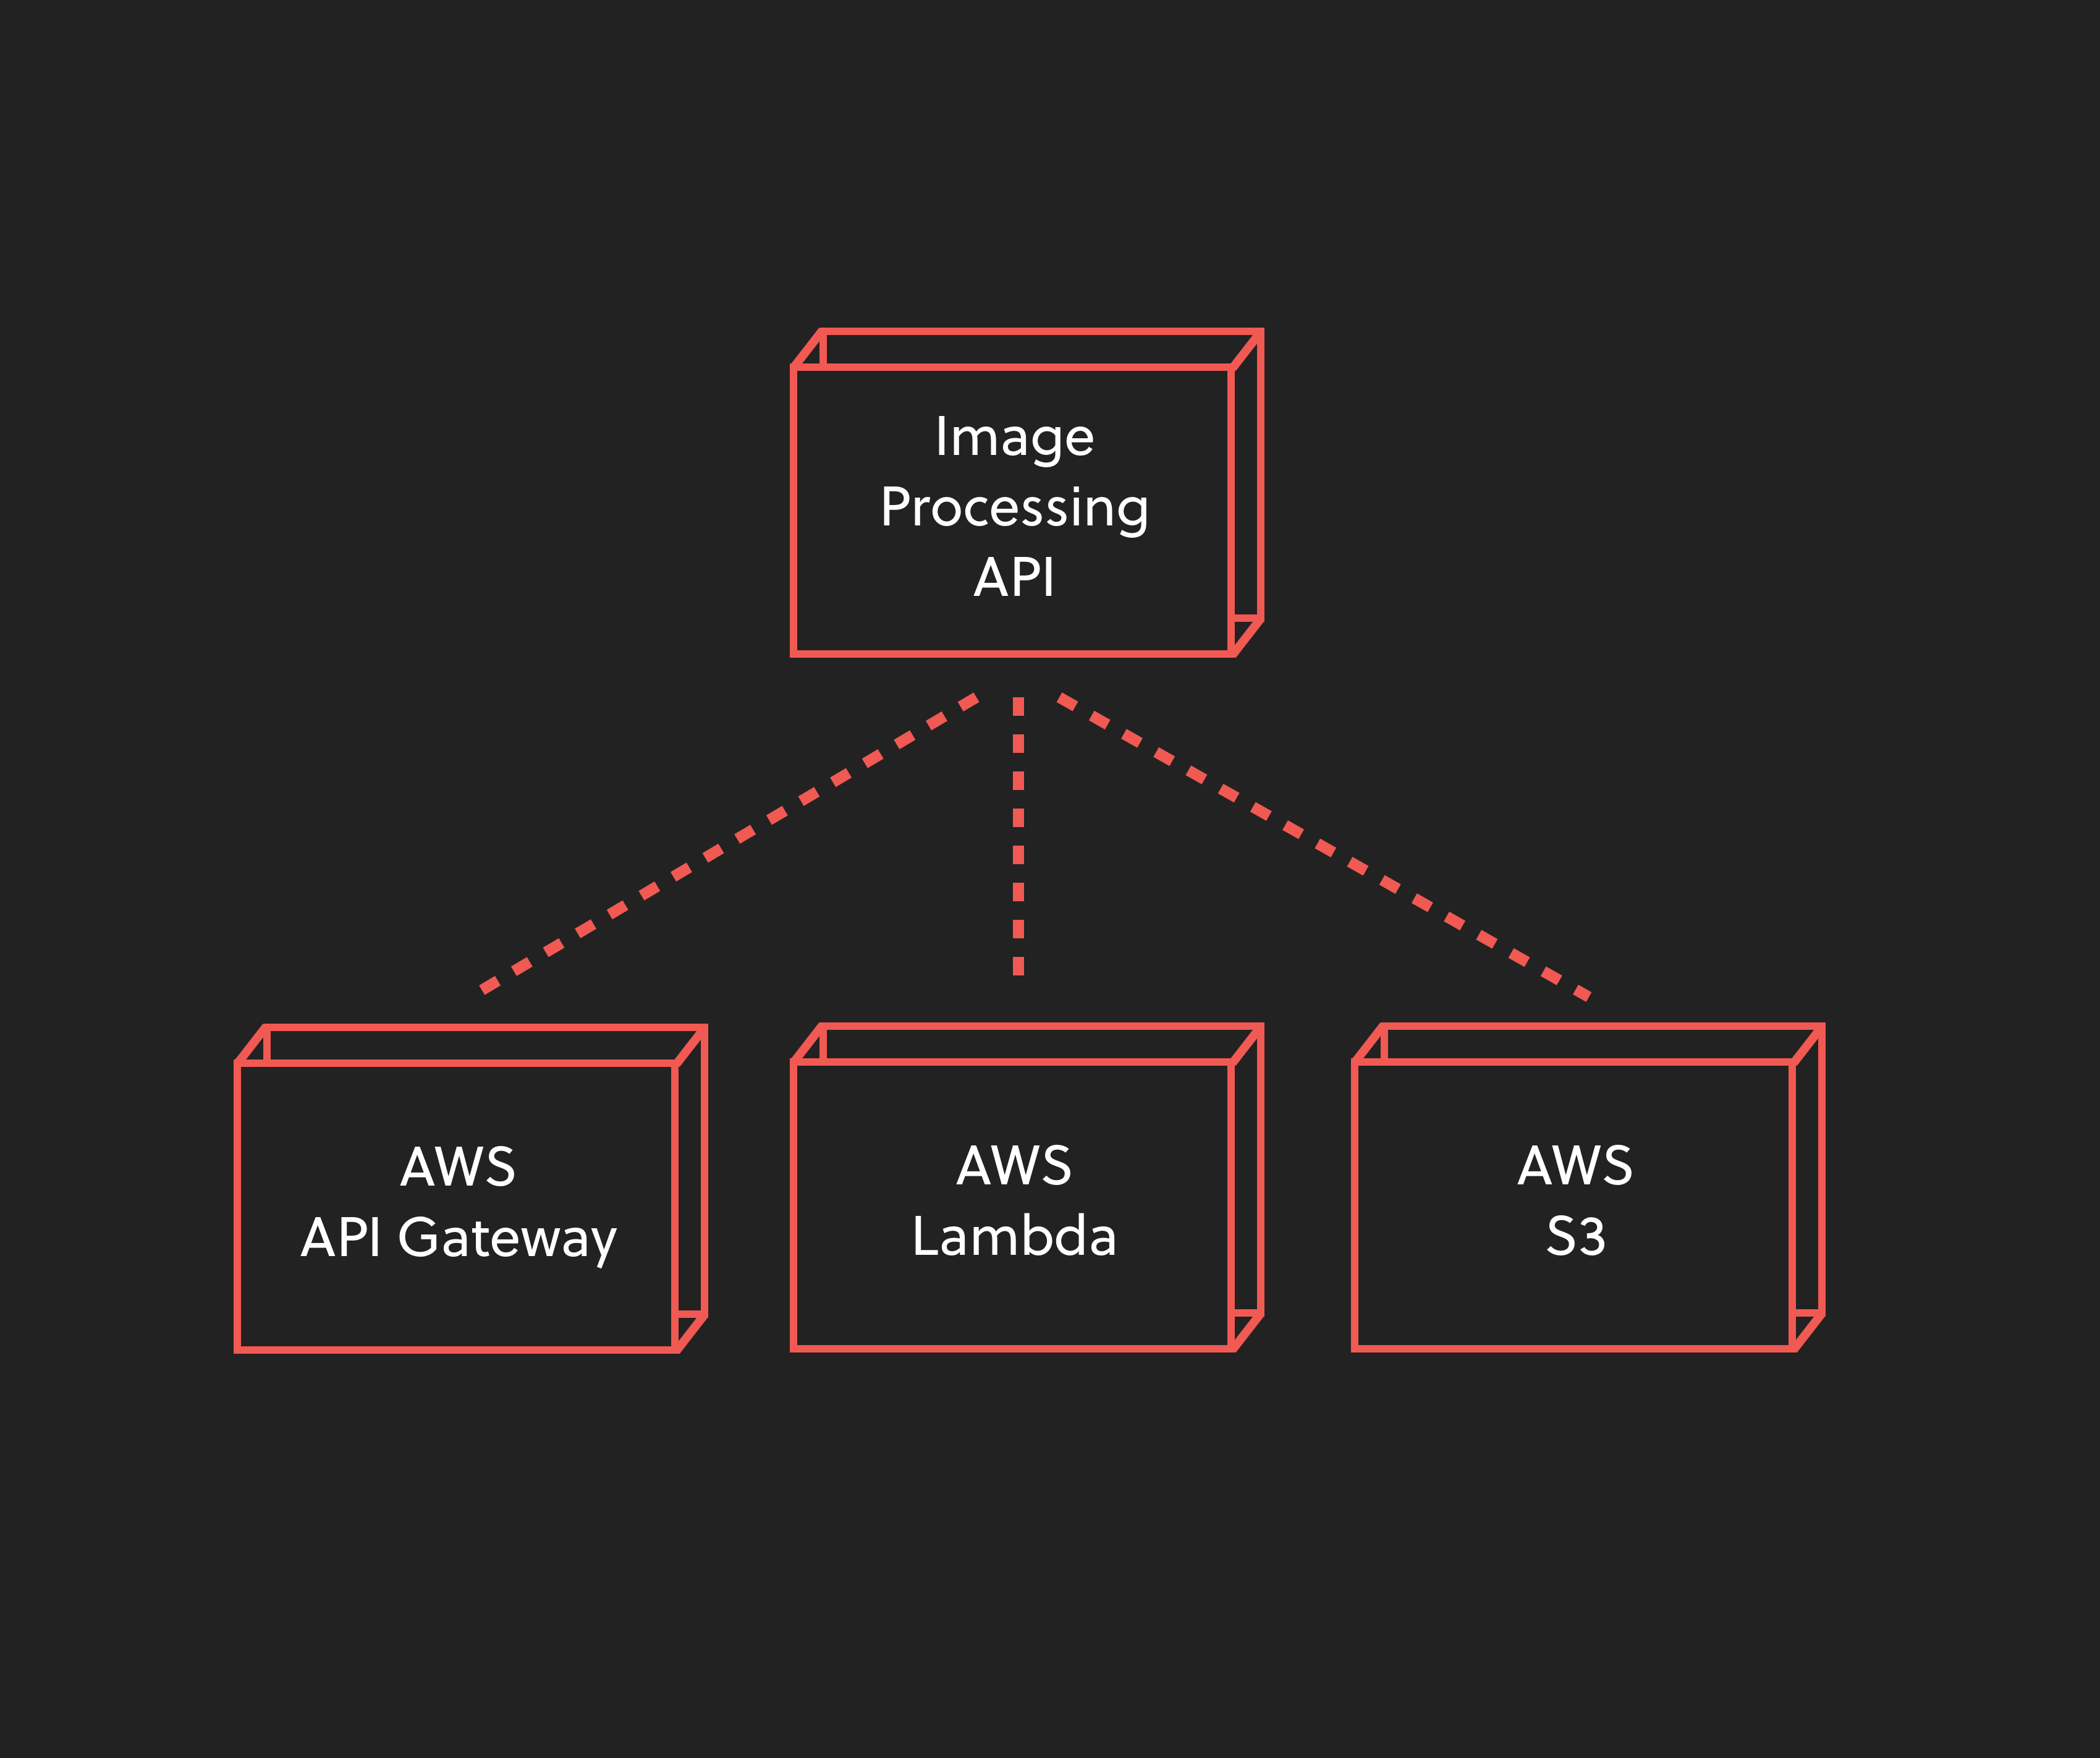
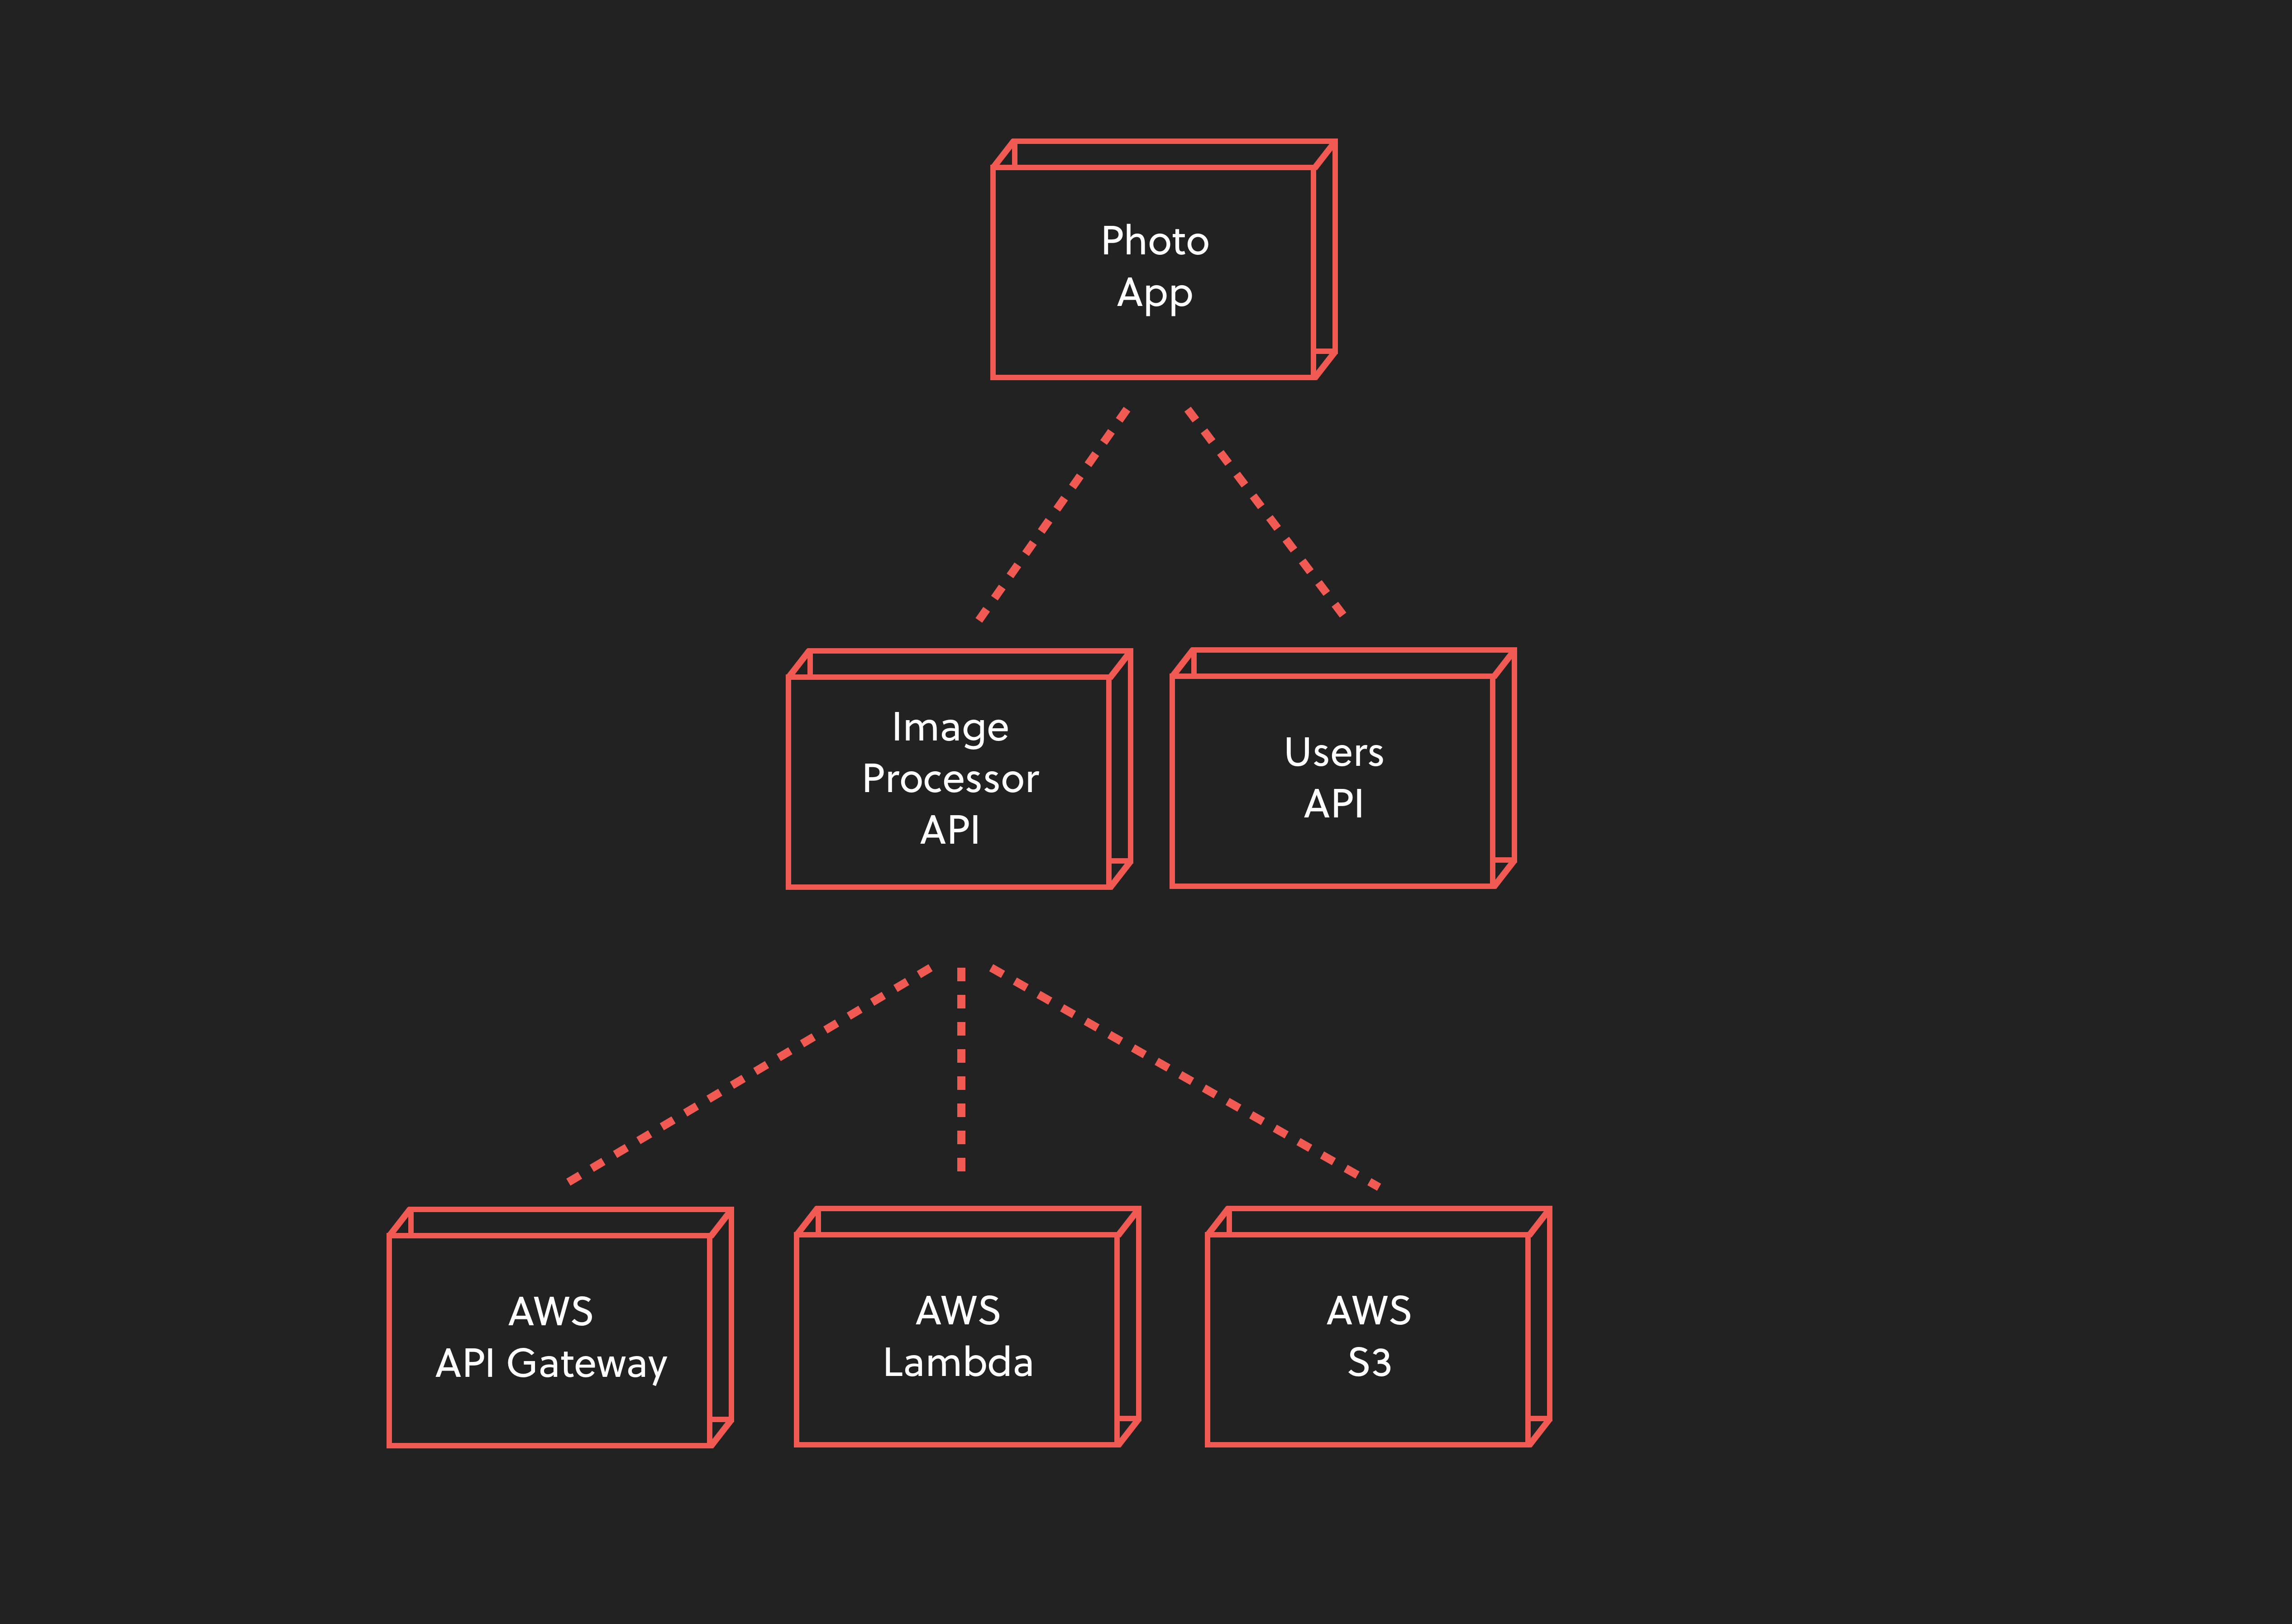
To take a look at a simple example, let’s imagine that we want to deploy multiple AWS Lambda functions to AWS.
Doing this the old way
Taking a deeper look into AWS Lambdas internals, we see that every Lambda function needs an IAM role. Further, we need to configure parameters such as “Memory size” or “Timeout”. We need to provide the zipped source code and ship it alongside our AWS Lambda function.
We could accomplish our task by manually creating an IAM role, configuring the (“Memory size” and “Timeout”), and zipping and uploading the code. But doing this manually is cumbersome and error-prone. And, there’s no way to re-use common logic to create other AWS Lambda functions in the future.
Doing this with components
Enter: Serverless Components! The components concept provides an easy way to abstract away common functionality, making it easier to re-use that functionality in multiple places.
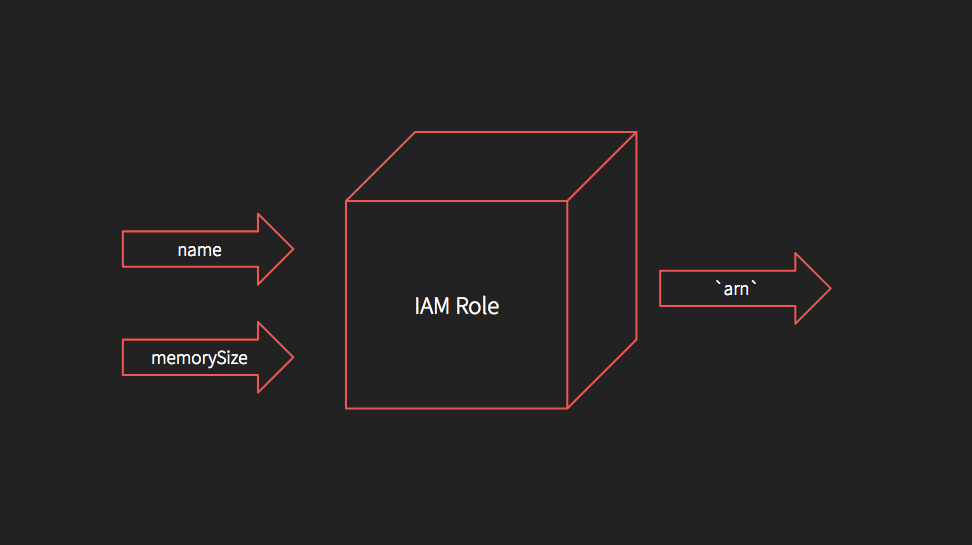
In our case, we would componentize the AWS IAM role into one component, which takes a name and the service as inputs, creates an IAM Role, and returns the arn as an output:
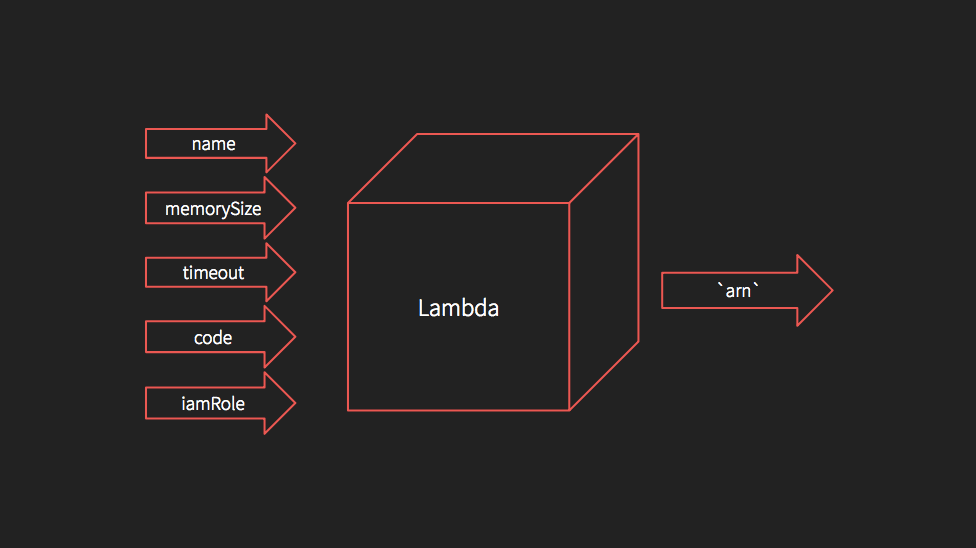
We could similarly componetize the AWS Lambda function into another component, which takes the name, memorySize, timeout, code and iamRole as inputs, creates the AWS Lambda function, and returns the arn as an output:
Then, we’d be able re-use our two components to create dozens of AWS Lambda functions and their corresponding roles, without the need to manually create Lambda functions or IAM roles ever again.
Write once, use everywhere.
Installing Serverless Components
First up, you’ll need to get Serverless Components installed on your machine.
Serverless Components is a CLI tool written in JavaScript that helps in deploying, testing, and removing our component-based applications.
To install, simply run: npm install --global serverless-components.
Note: Right now Serverless Components needs Node.js 8 or greater. Compatibility with older Node.js versions is already in the making.
Components we’re using to build this API
Let’s take a quick look at the different components we’ll use throughout this tutorial to build our REST API-powered application.
aws-lambda
The aws-lambdacomponent gives us a convenient way to deploy Lambda functions to AWS.
When using it, we’ll need to supply memory, timeout, and handler properties. All other configurations (such as the function name) are optional.
The Lambda component will even auto-generate and automatically manage an IAM role for us, if we don’t specify one.
You can find the documentation and some examples in the AWS Lambda component registry entry.
aws-dynamodb
The aws-dynamodb component makes it possible to create and manage DynamoDB tables.
The only configurations necessary for this component are (1) the region, in which the table should be created; (2) an array called tables, which includes the different DynamoDB-specific table definitions.
The components documentation shows some example uses.
rest-api
The component creates a REST API according to a config consisting of a gateway and routes property.
gateway config
The gateway config property determines where the REST API should be created. The component currently supports aws-apigateway to setup a REST API on AWS using the API Gateway, and eventgateway to setup a REST API using the hosted version of Event Gateway.
In this post, we’ll be using the aws-apigateway configuration to tell the Framework that we want to set up our REST API on AWS using the API Gateway service.
routes config
The routes config property is used to specify the routes with its paths and methods and maps them to the Lambda functions which should be invoked when accessing those routes.
If for example, you want to implement a “Products” API you’d create routes like this:
| Method | Path | Description | | — — — — | — — — — — — — — | — — — — — — — — — — — — — — — — — — — — — | | GET | /products | List all products | | GET | /products/{id} | Get the product with id {id} | | POST | /products | Take product data and create a new product | | DELETE | /products/{id} | Delete the product with the id {id} |
That’s it. When deploying the component to AWS, the Framework will automatically create a REST API using the API Gateway service and return the URLs we can use to perform the above operations.
You can find the documentation and some examples in the REST API component registry entry.
Building our application
Enough theory. Let’s dive right into the code and build an application!
Creating a component project
Let’s start by creating a new components project. A components project is simply a directory containing a serverless.yml file.
To start, create a new directory called products-rest-api by running mkdir products-rest-api. After cding into it, we'll need to create an empty serverless.yml file by running touch serverless.yml. Then, open this directory with your favorite code editor.
In order to tell Serverless that we have a components project, we need to add the following lines of code to our serverless.yml file:
The type property tells the Framework that our application is called rest-api-app.
If you compare this information with serverless.yml files from components in the registry, you might see that they too have a type property at the root level. This is because our rest-api-app application is itself a component, which could be re-used by other components or projects.
There is no distinction between an application or a component. Both are components at the end of the day.
Adding a products DB table
Since our REST API will be used to store and retrieve product data, we’ll need to have a database backend to persist such products.
The aws-dynamodb component makes it easy for us to use and manage AWS DynamoDB tables. Let's add this component to our application.
Add the following code into your projects serverless.yml file:
With this code snippet, we’ve officially added the first component to our project!
Components can be added and configured in the components section, and configured via inputs. In our example, we've added a component we called productsDb with the type aws-dynamodb. We then created a new DynamoDB table called products in the us-east-1 region.
Our database schema is defined with the schema property, and defines the products properties id, name, description and price.
Adding our Lambda functions
The next thing we need to do is add AWS Lambda functions to create and list our products.
Let’s start with the createProduct function, which will insert a new product into the database.
createProduct
Paste the following code into the products.js file:
Here, we imported the AWS SDK, which is required to make AWS SDK calls. Then, we created a new DynamoDB instance called dynamo.
We fetched the table name from the function's environment variables and defined our create function, which includes the logic to insert a new product record into the database.
Note that we’re already using an event shape which corresponds to the AWS API Gateway event definitions.
Next up, we need to add an AWS Lambda component to our serverless.yml file:
Here, we’re adding our createProduct component which is of type aws-lambda.
We’ve defined the function’s configuration with the help of the component’s inputs section. Note that we're specifying the path to our function's code with the help of the root property and the environment variables via env.
getProduct and listProducts
Let’s add the functionality to fetch a single product ( getProduct), as well as all products ( listProducts), from the database.
Add the following JavaScript code to the products.js file:
With this code, we simply defined and exported two functions, called get and list, which will query our DynamoDB database and return the result formatted in a way the API Gateway understands.
Let’s add two new AWS Lambda components to our serverless.yml—one component for the get function and one for the list function:
We also passed in the corresponding environment variables via env to ensure that our Lamdba functions had access to our DynamoDB table name.
That’s it from an AWS Lamdba functions perspective!
Adding the rest-api components
The last missing piece is the rest-api component, which ties everything together and makes it possible to interact with our Products application end-to-end.
Adding and configuring our REST API is as easy as adding the corresponding component configuration to our serverless.yml file:
Here, we created our productsApi REST API using the component with the type rest-api. Via inputs, we configured it to use the aws-apigateway component under the hood as our gateway of choice.
Then, we defined our routes. Generally speaking, we defined 3 routes, one for each function. We made /products accessible via GET and POST, and specific products accessible at /products/{id} via GET.
A speciality in this component definition is the use of Serverless Variables via ${}. Serverless Variables makes it easy for us to reference different values from different sources: environment variables, component outputs, or the serverless.yml file itself.
In our case, we’re referencing the AWS Lambda components by name and passing those functions into our rest-api component. This way, the component knows how to configure the REST API so that the corresponding function is called when a request is sent to the endpoint.
Enabling cors for our endpoints is as easy as adding the cors: true configuration to our route.
Deploy and testing
That’s it! We wrote all the necessary code to set up and configure our fully-fledged REST API!
We now have a REST API which is accessible via 3 different API endpoints. This REST API will trigger our AWS Lambda functions, which in turn reach out to DynamoDB to query our products.
Let’s Deploy and test our application!
Deploying is as easy as running components deploy.
We can see our API Gateway endpoints at the end of the deployment logs. It should look something like this:
Let’s insert a new product.
We can curl our /products endpoint via POST:
Great! Now we should be able to get our inserted product via the following GET request:
A list of all products can be requested like this:
Nice! Feel free to continue playing around with your REST API.
Once done, you can remove the application via components remove.
Conclusion
We’ve just created our very first product REST API via Serverless Components. And we did it by using three different pre-built components from the Serverless Components registry ( aws-lambda, aws-dynamodb and rest-api).
Setting everything up was as easy as adding the function logic and the corresponding component configurations in our serverless.yml file.
I hope that you’ve enjoyed this tutorial, and got a feeling for how powerful Serverless Components are.
You could enhance this project further by adding a static website interface with the help of the static-website component.
The section in our Serverless Components repository is another great resource to get some inspiration what else you can build with the Serverless Components framework.
More Components posts
How to create a static landing page with Serverless Components
How to create a blog using pre-built Serverless Components and Hugo
Originally published at https://www.serverless.com.

